Sewing Caddy Tutorial
View more tutorials on Fabricworm.com
by Bethany at Sew Not Perfect
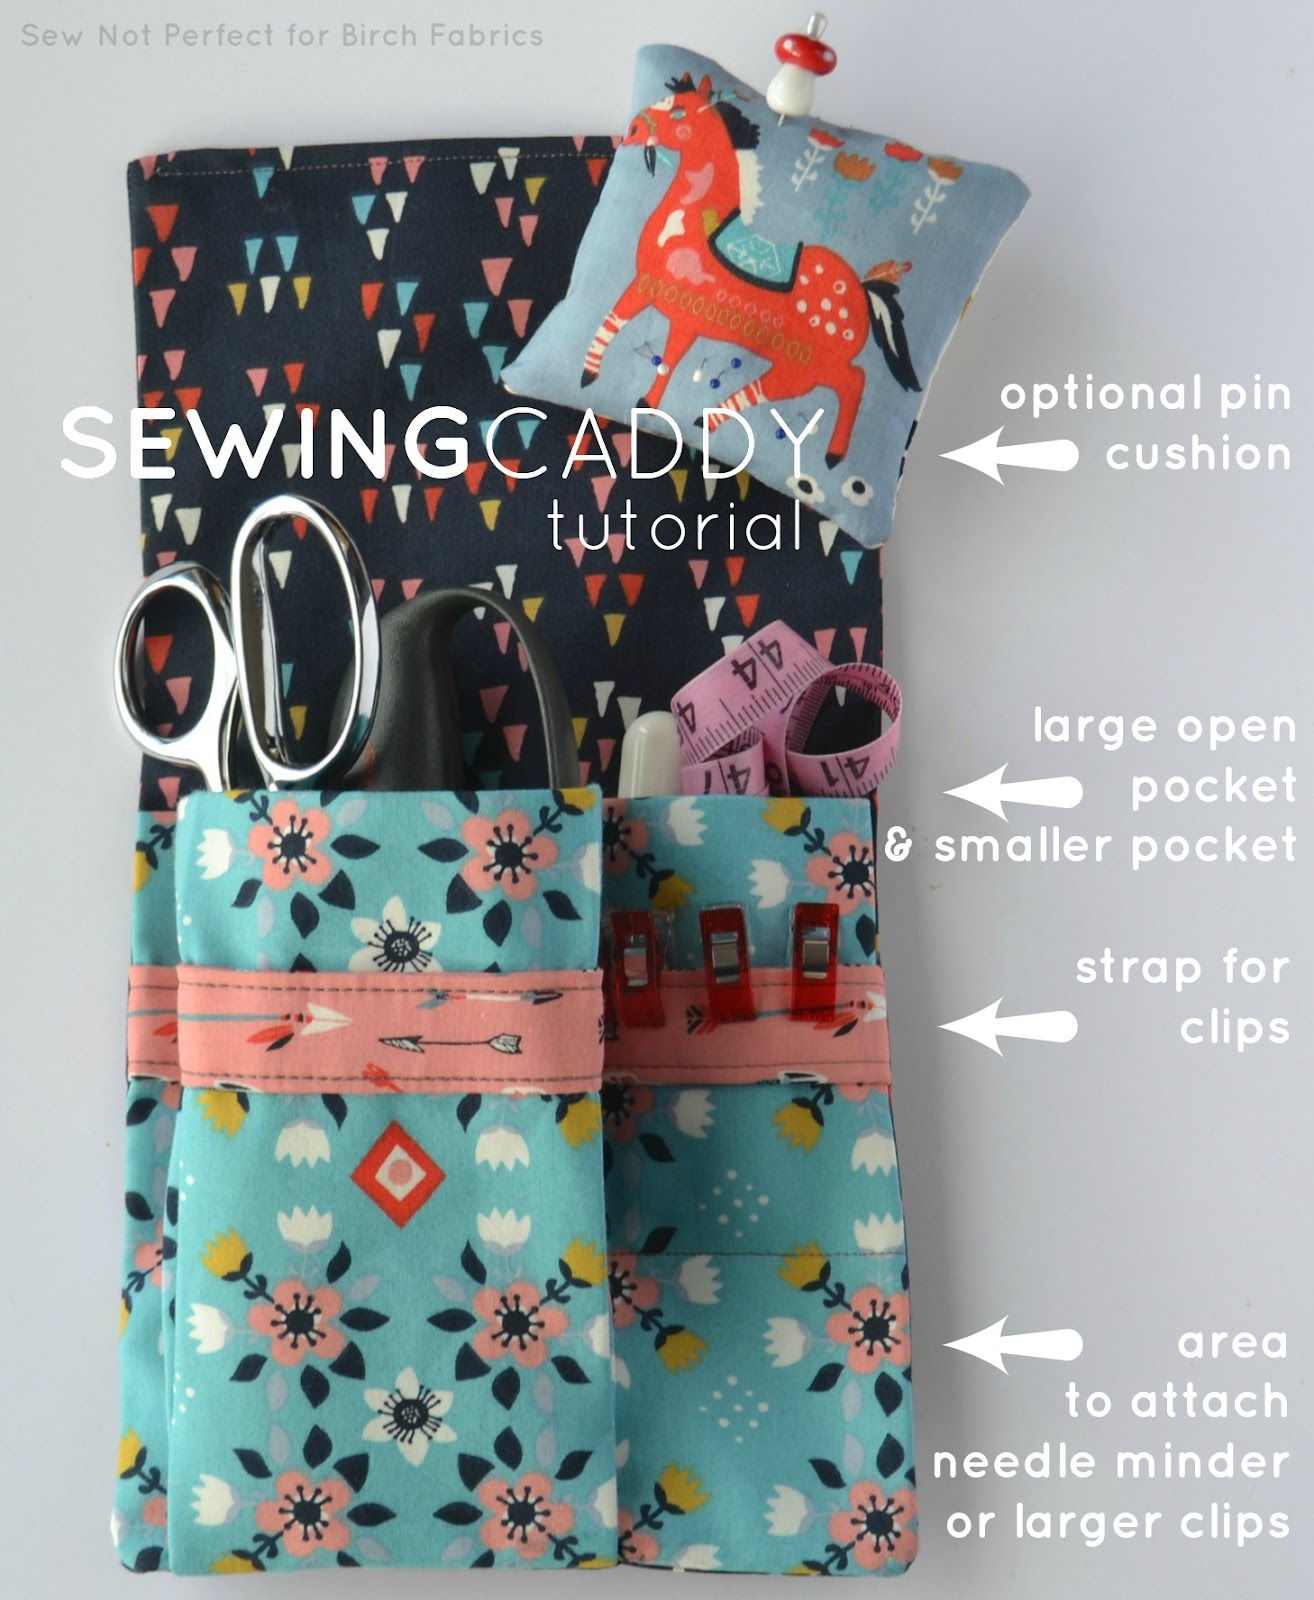
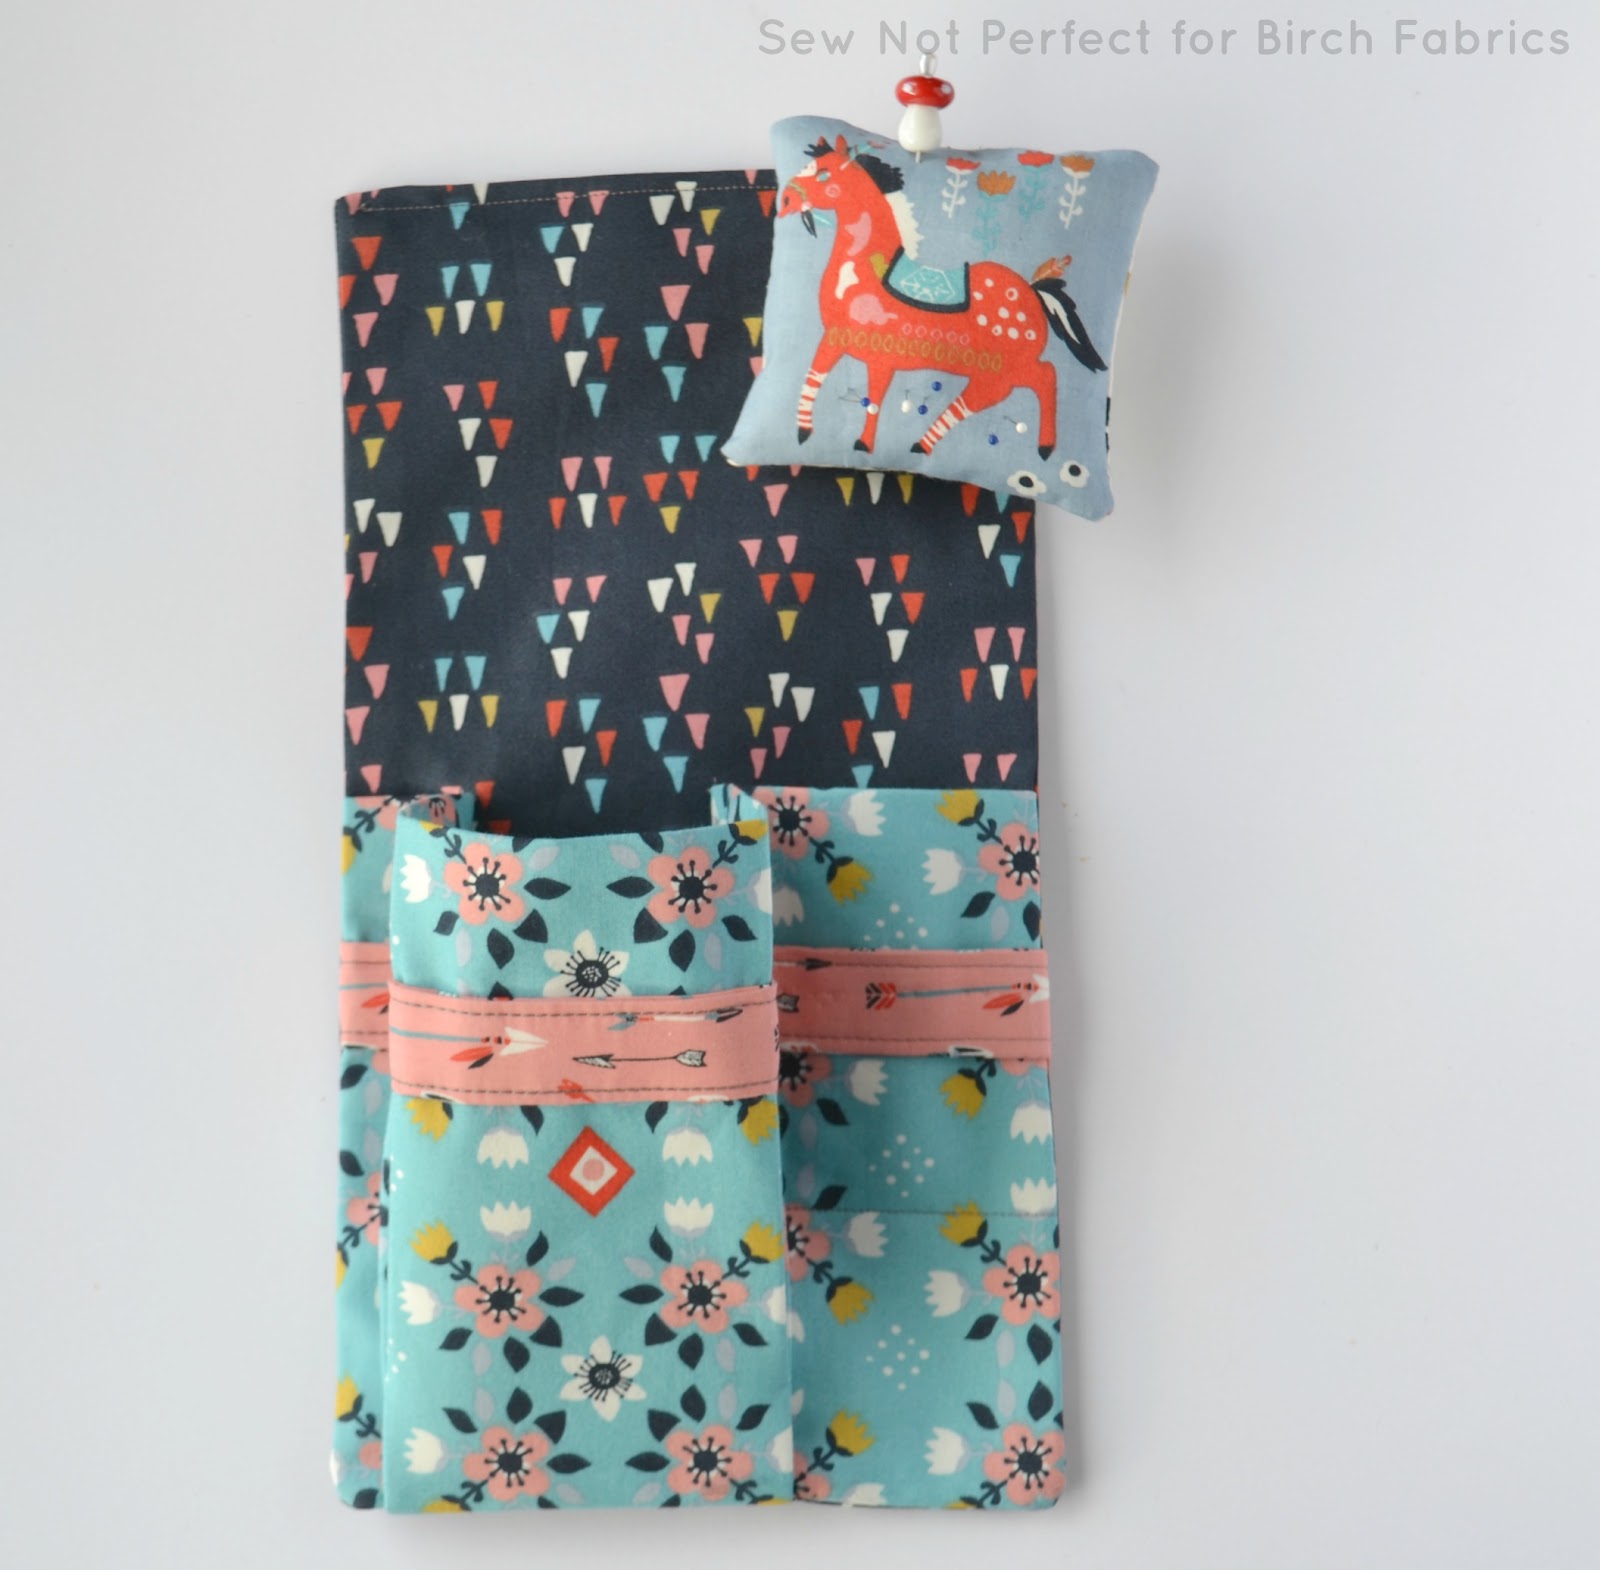
This convenient caddy sits under your machine to hold notions or collect clippings and is ideal for sewing at home, at classes or retreats. The smaller size keeps it out of the way and appropriate for a serger as well as a sewing machine. A large pocket can hold scissors or a rotary cutter, or be used to collect thread and fabric clippings - it can even be positioned to catch the fabric cut off by the serger blade. A smaller pocket is the ideal size for your seam ripper, fabric marking tool, hem gauge, or other tools, and a convenient strap holds fabric clips. This caddy will keep everything you need organized and within arm’s reach.

Supplies
Fabric - three or four fat quarters, or ½ yard of fabric depending on preference.
Pellon SF101 fusible interfacing
fabric marking tool
coordinating thread
pins or clips
for optional pin cushion: Fiberfill, or batting or fabric scraps
Preparation
Cut the following from both fabric and interfacing:
-
-
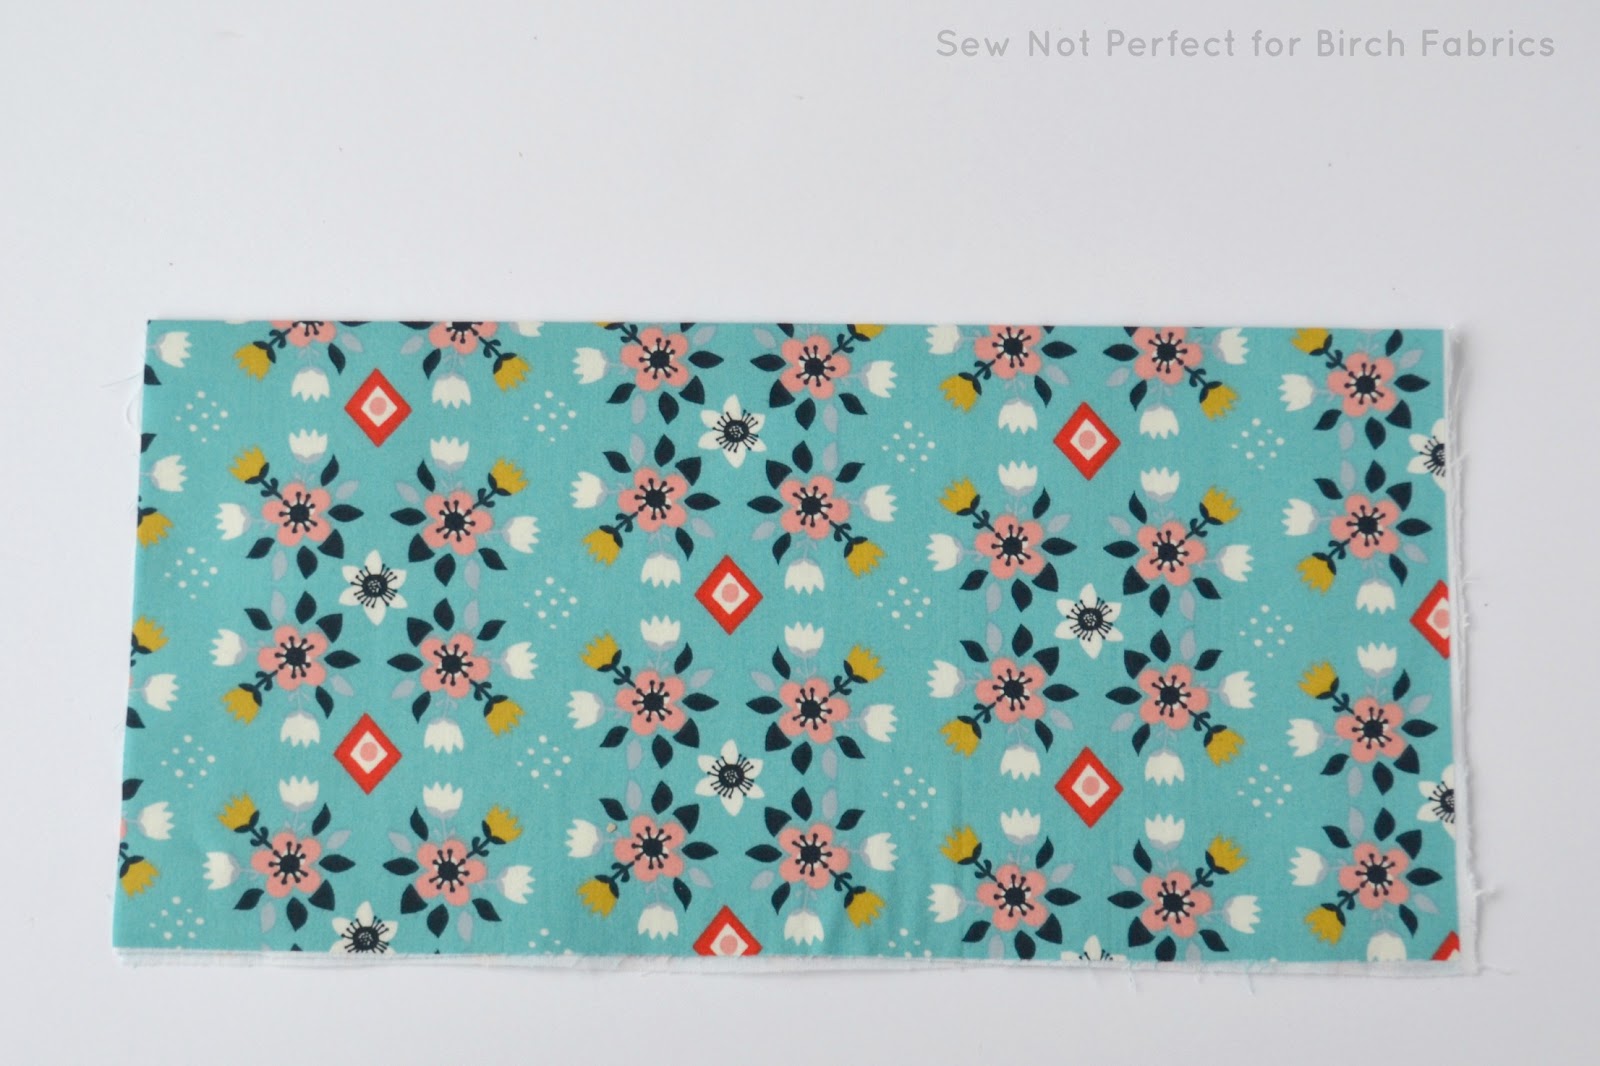
POCKET PIECE - cut 15.25”w x 15”h {I used Birch Fabrics Wildland Flowerbed Blue}
note: the bottom half of this fabric will face outward, if placement matters
-
(optional) PIN CUSHION - cut 4.5”w x 9” h {I used Birch Fabrics Wildland Patch}

Instructions
1. Fuse interfacing to each corresponding fabric piece (keep iron on and ready to use).
2. Take the POCKET PIECE and fold in half and press with iron. (The POCKET PIECE should now measure 15.25”w x 7.5”h). The folded edge is now the top, and the unfinished edges are the bottom.
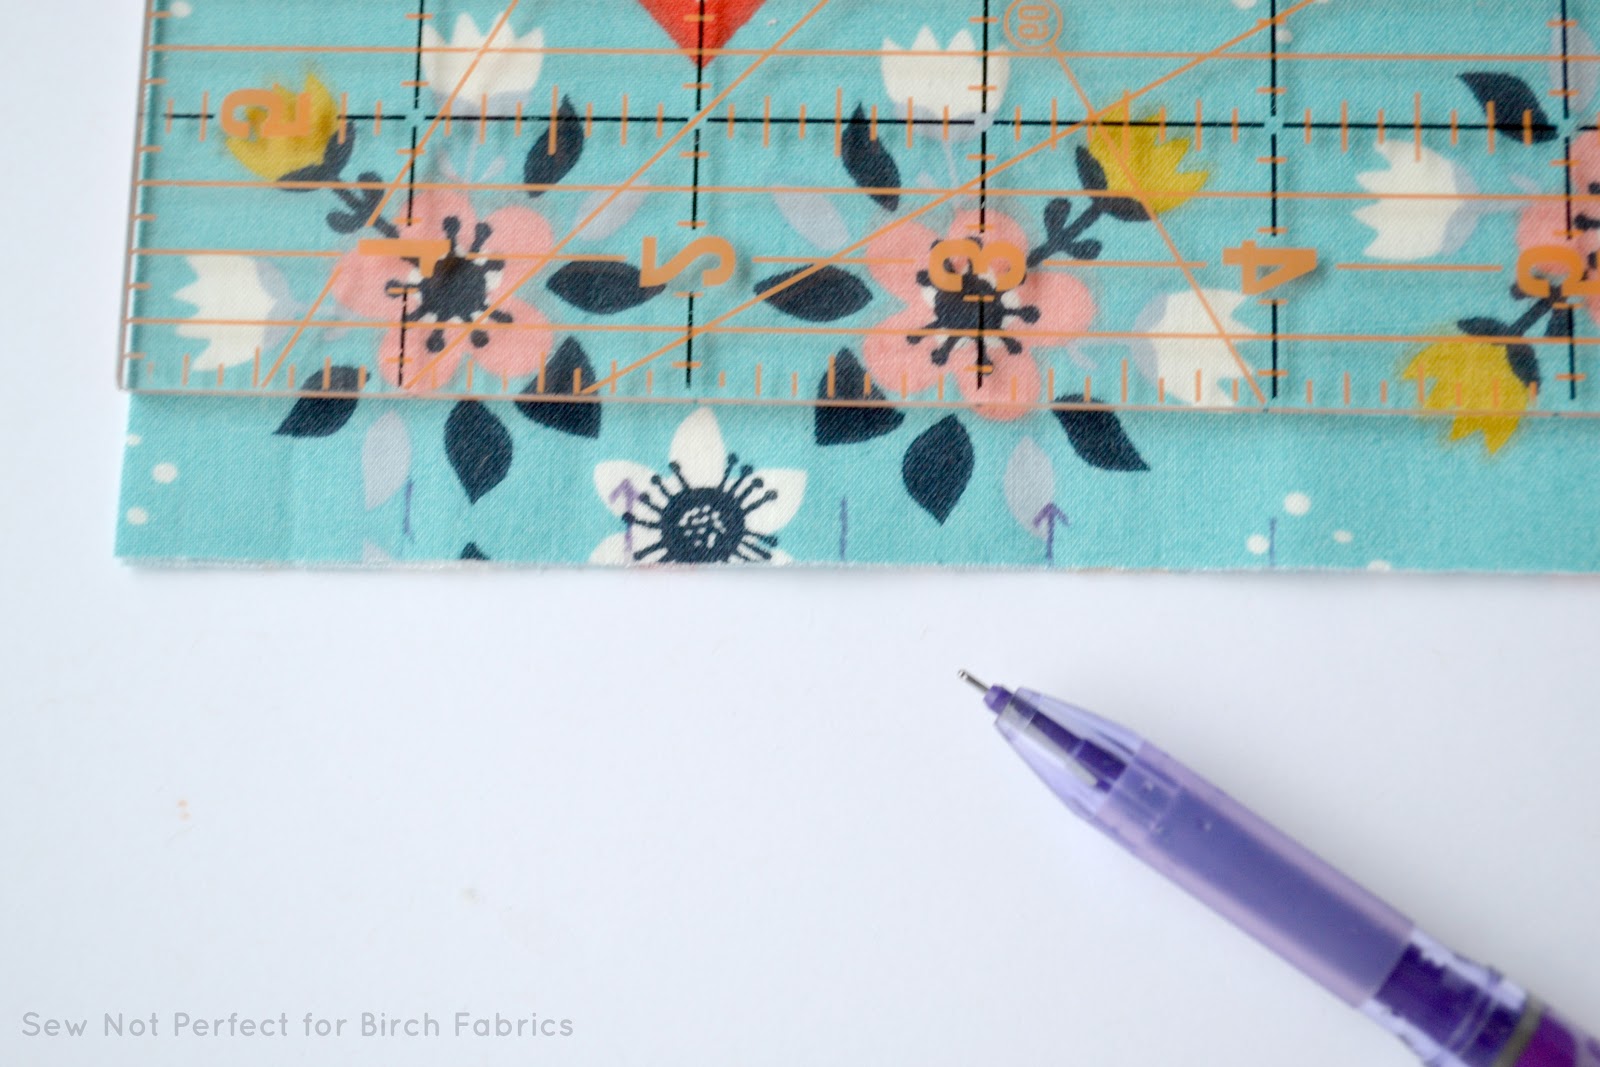
Using a fabric marking tool, make the following marks within the ½” seam allowance along the bottom edge of the front side:
I (straight line) at 1”, 2.5”, 4”, 8”, 9.5” and 11”
^ (or an arrow) at 1.75”, 3.25”, 8.25” and 10.25”
Fold the POCKET PIECE in an accordion-like fashion by folding the arrow markings back and joining the straight lines together. Press creases well and set this piece aside.

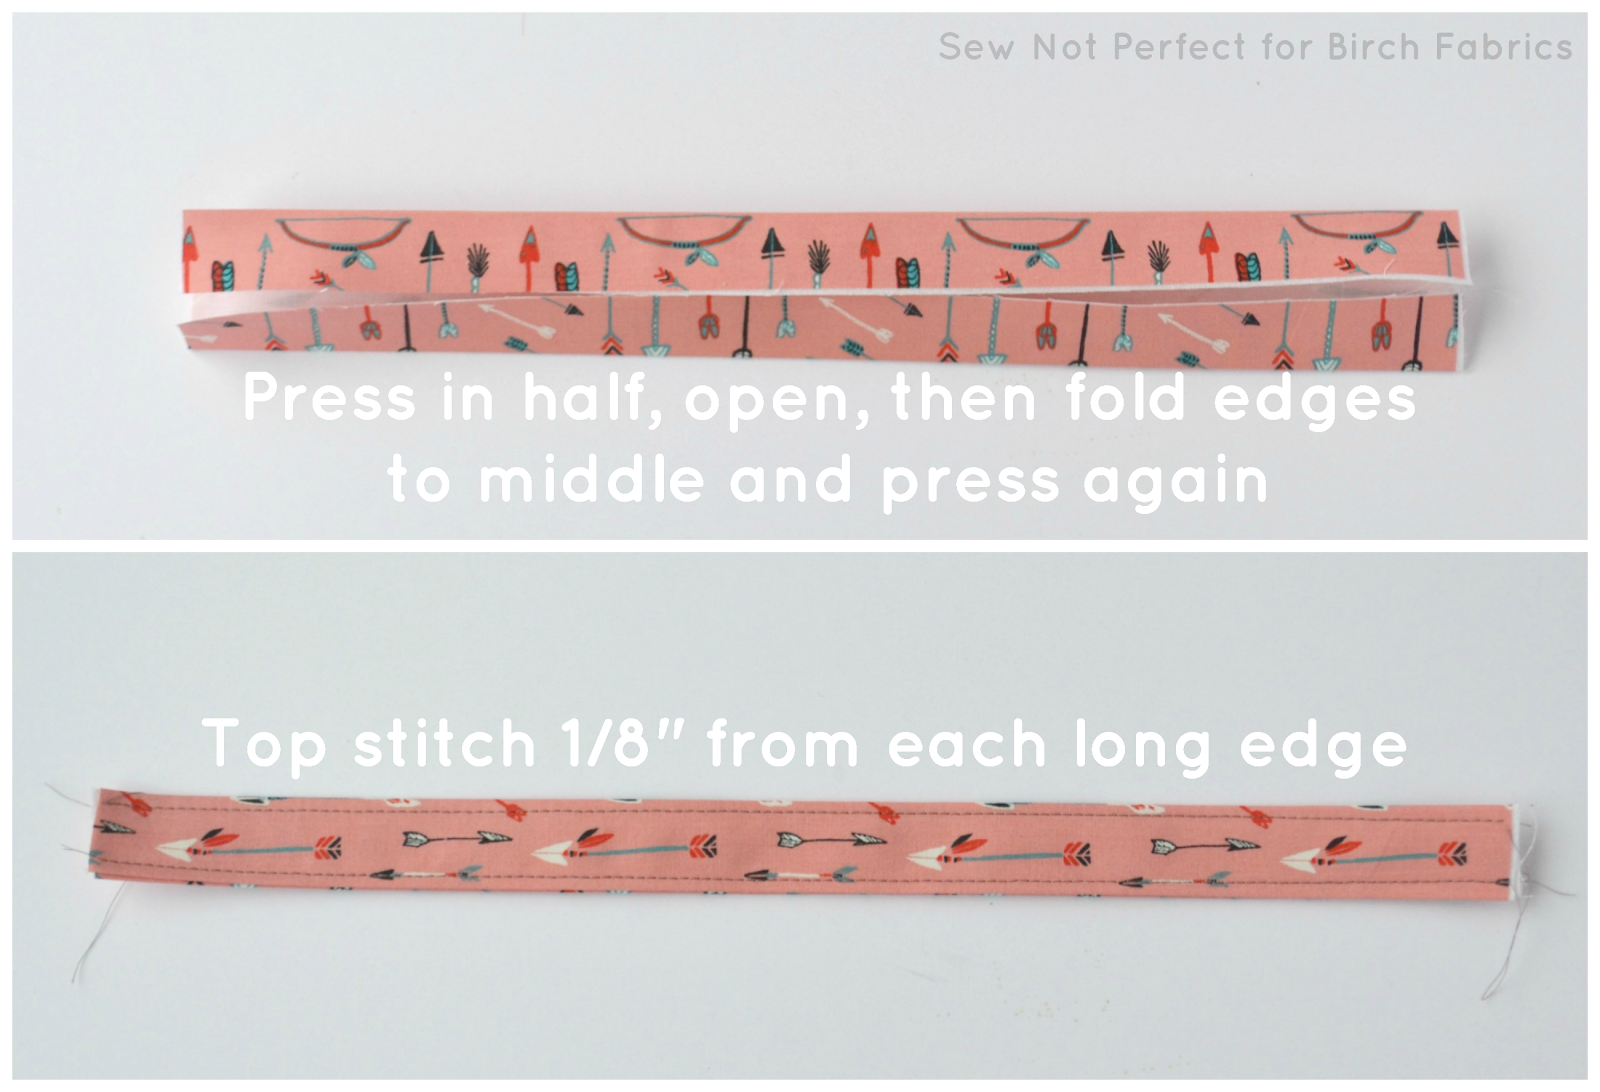
3. While iron is still out, fold STRAP PIECE in half lengthwise and press. Open and fold each long unfinished edge in toward middle crease and press again. Lastly, fold in half lengthwise along previous crease so raw edges are enclosed and pin or clip. Topstitch at about ⅛” along each long edge.
4. Place STRAP PIECE on top of POCKET PIECE 1.5” from the top (folded) edge (you will need to unfold the POCKET PIECE for now). Pin in place. Also draw a stitching line at 4” from the top of the POCKET PIECE extending from the right edge over to the final crease.
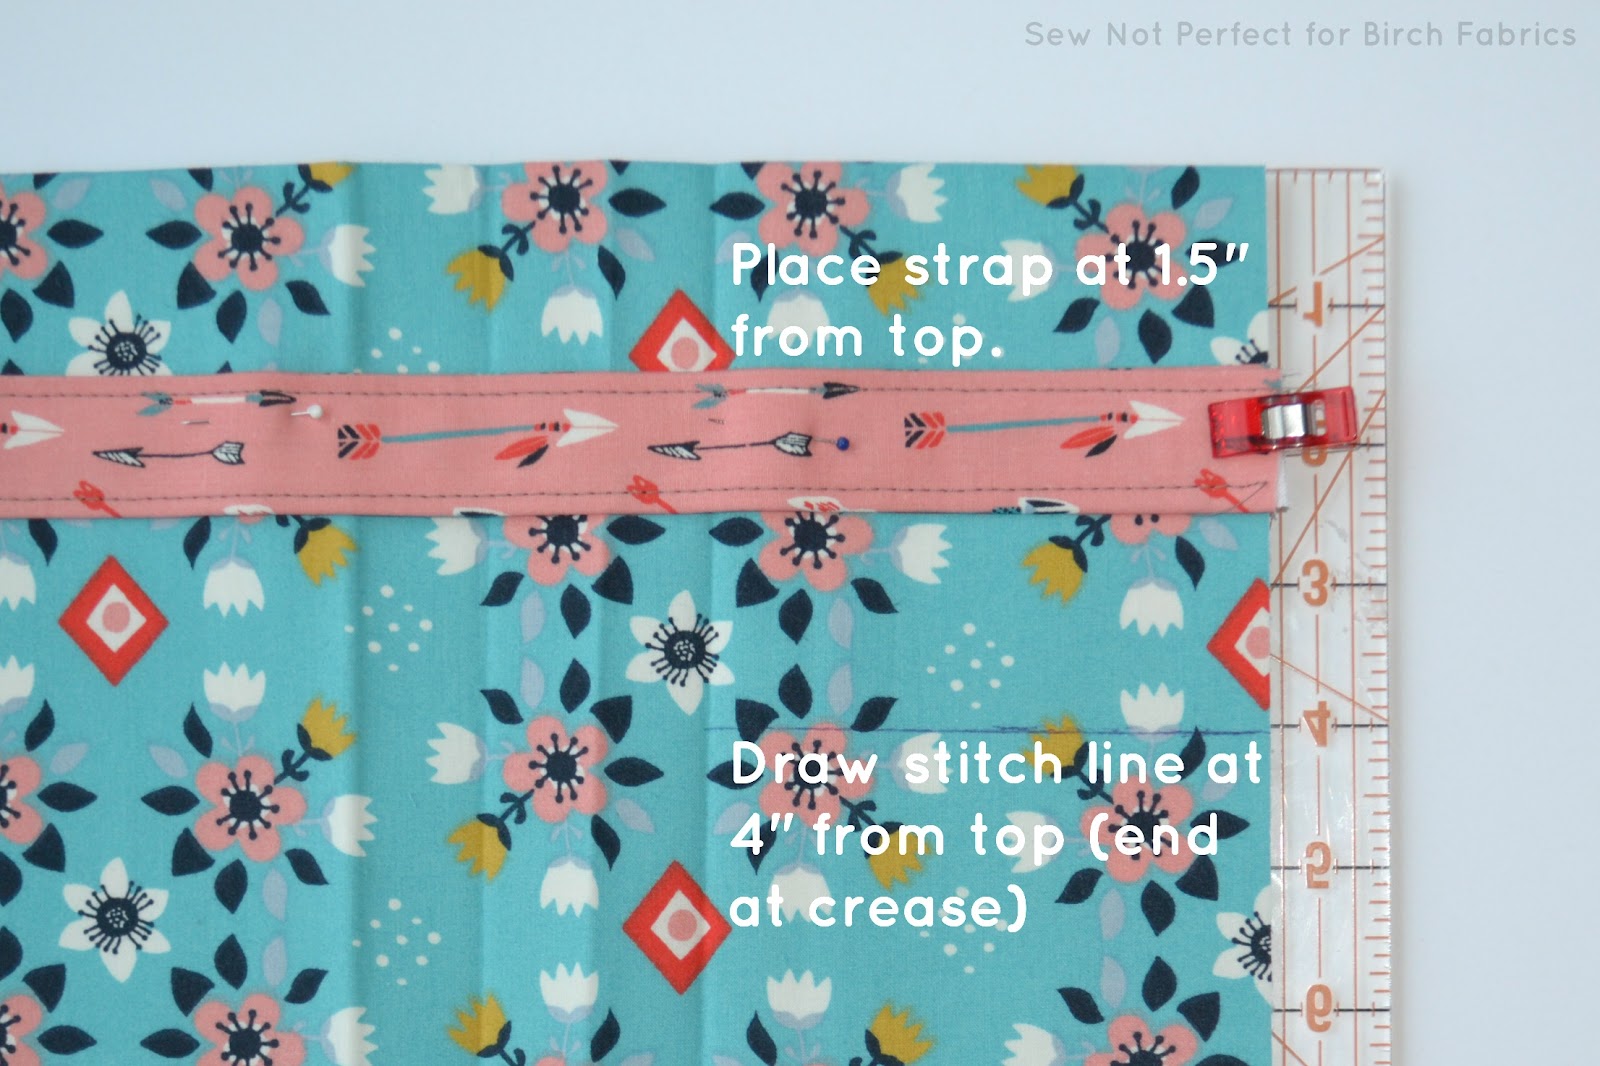
Baste the STRAP PIECE to the POCKET PIECE along the right edge. Then sew with a regular stitch length beginning at the final crease line over to the the left edge, up the strap along the left edge, and then back again. You will sew a complete rectangle and on the horizontal lines, you should follow your topstitch lines on the STRAP PIECE. When you are done, the STRAP PIECE should be fully sewn down to the left two-thirds of the POCKET PIECE, but on the right ⅓ it is only sewn down on the far right and left (but open along the top and bottom edge of this portion.

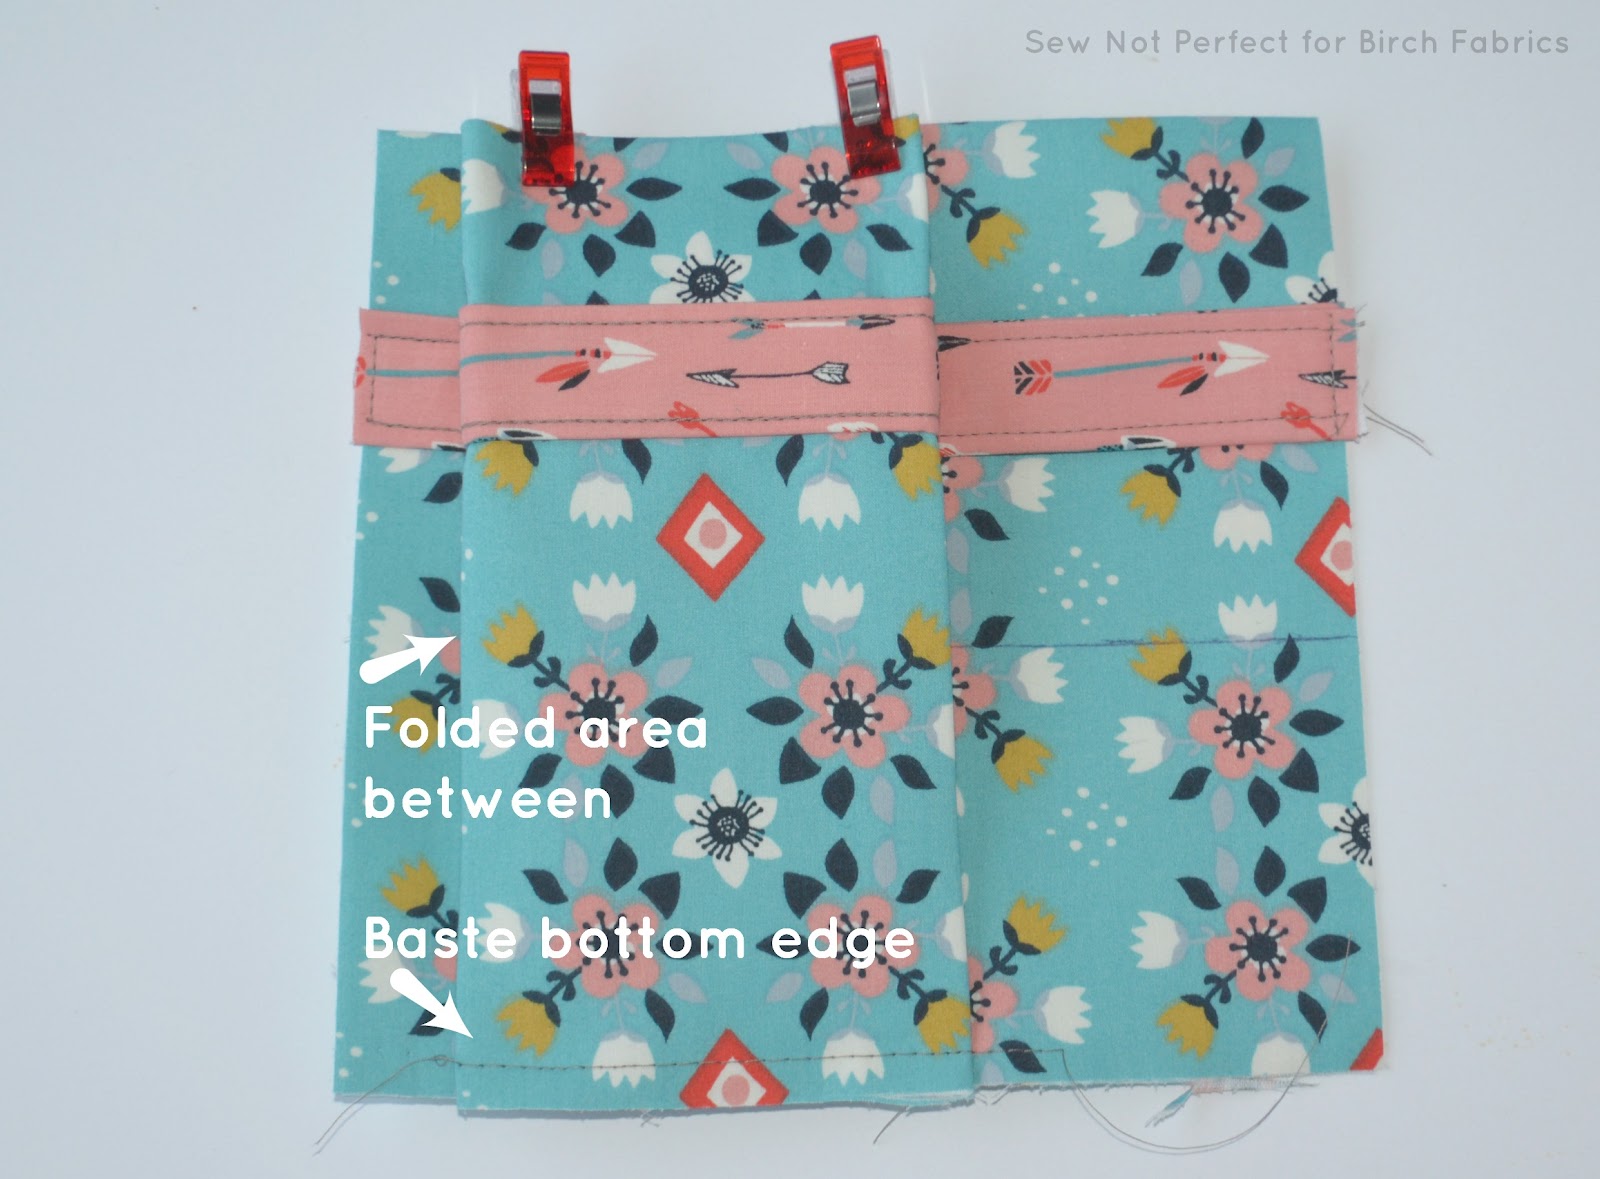
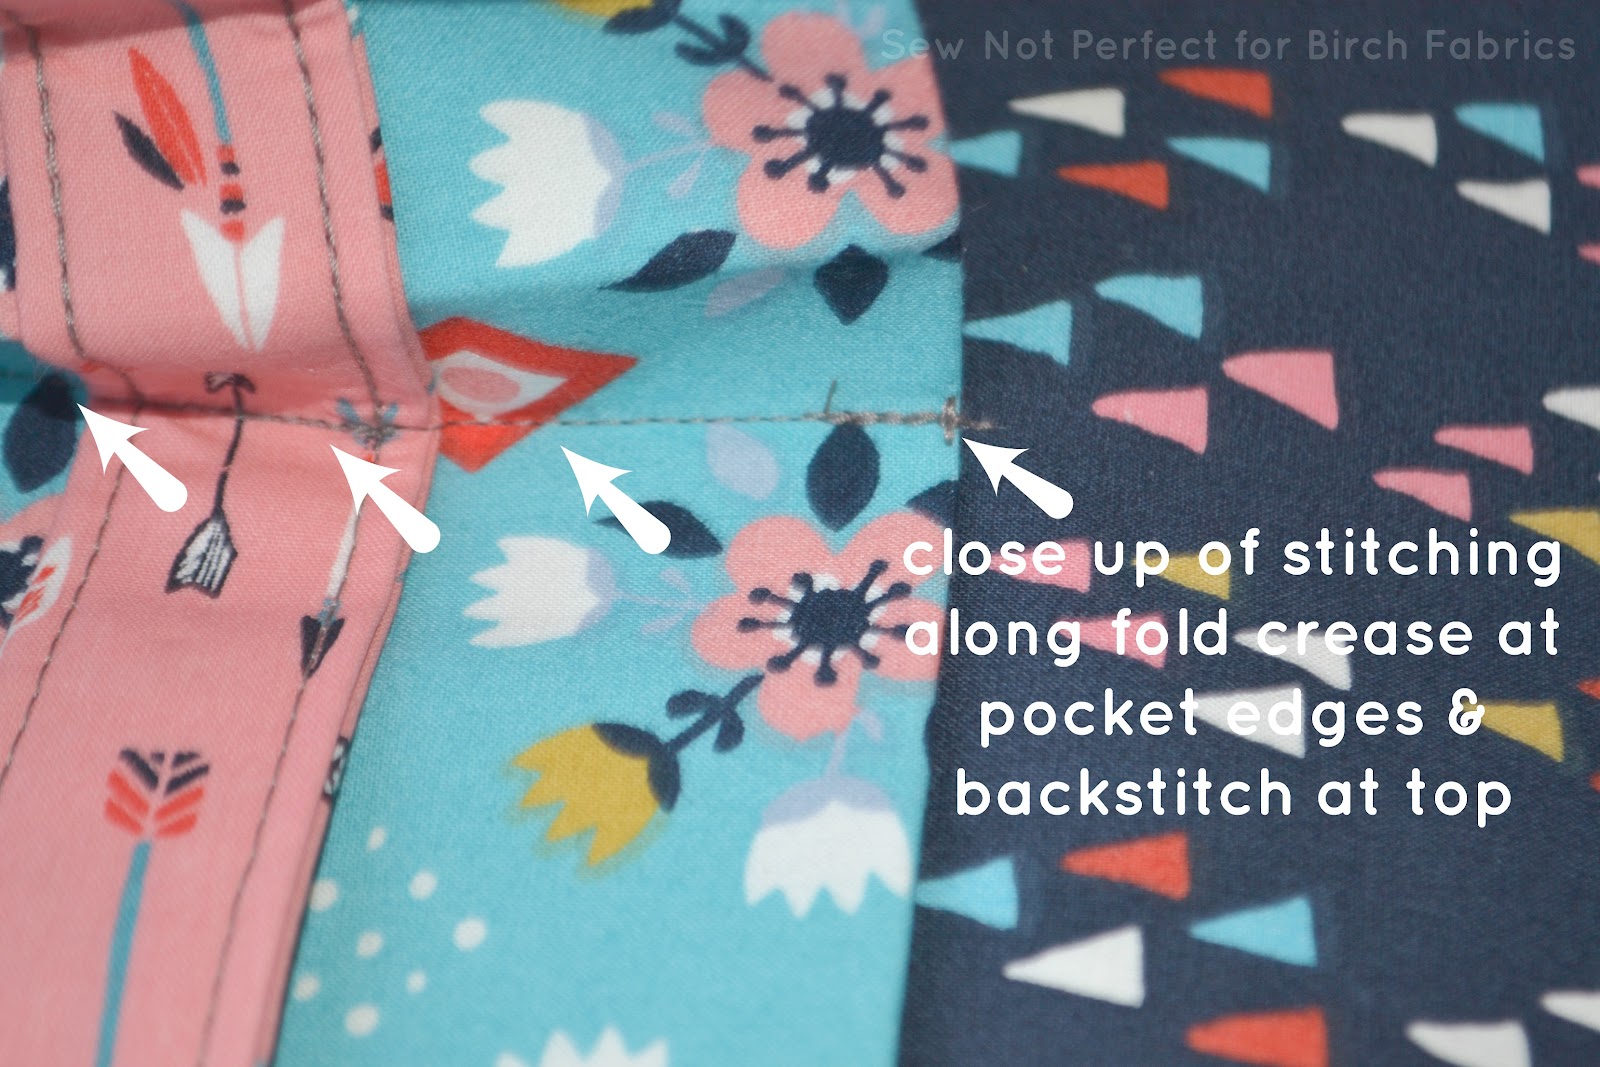
5. Re-fold the POCKET PIECE along the creases you made earlier. Clip or pin the folded parts together securely without going through the top layer. From the back side, sew a line through the folded layers beginning at the bottom edge and extending about 2” upward. Repeat for the other folded side. *The stitching should not go through the top layer of fabric.

Now, fold all the creases properly, so that the folds lay under the front of the POCKET PIECE (see picture). Baste in place along the bottom edge of the pocket.
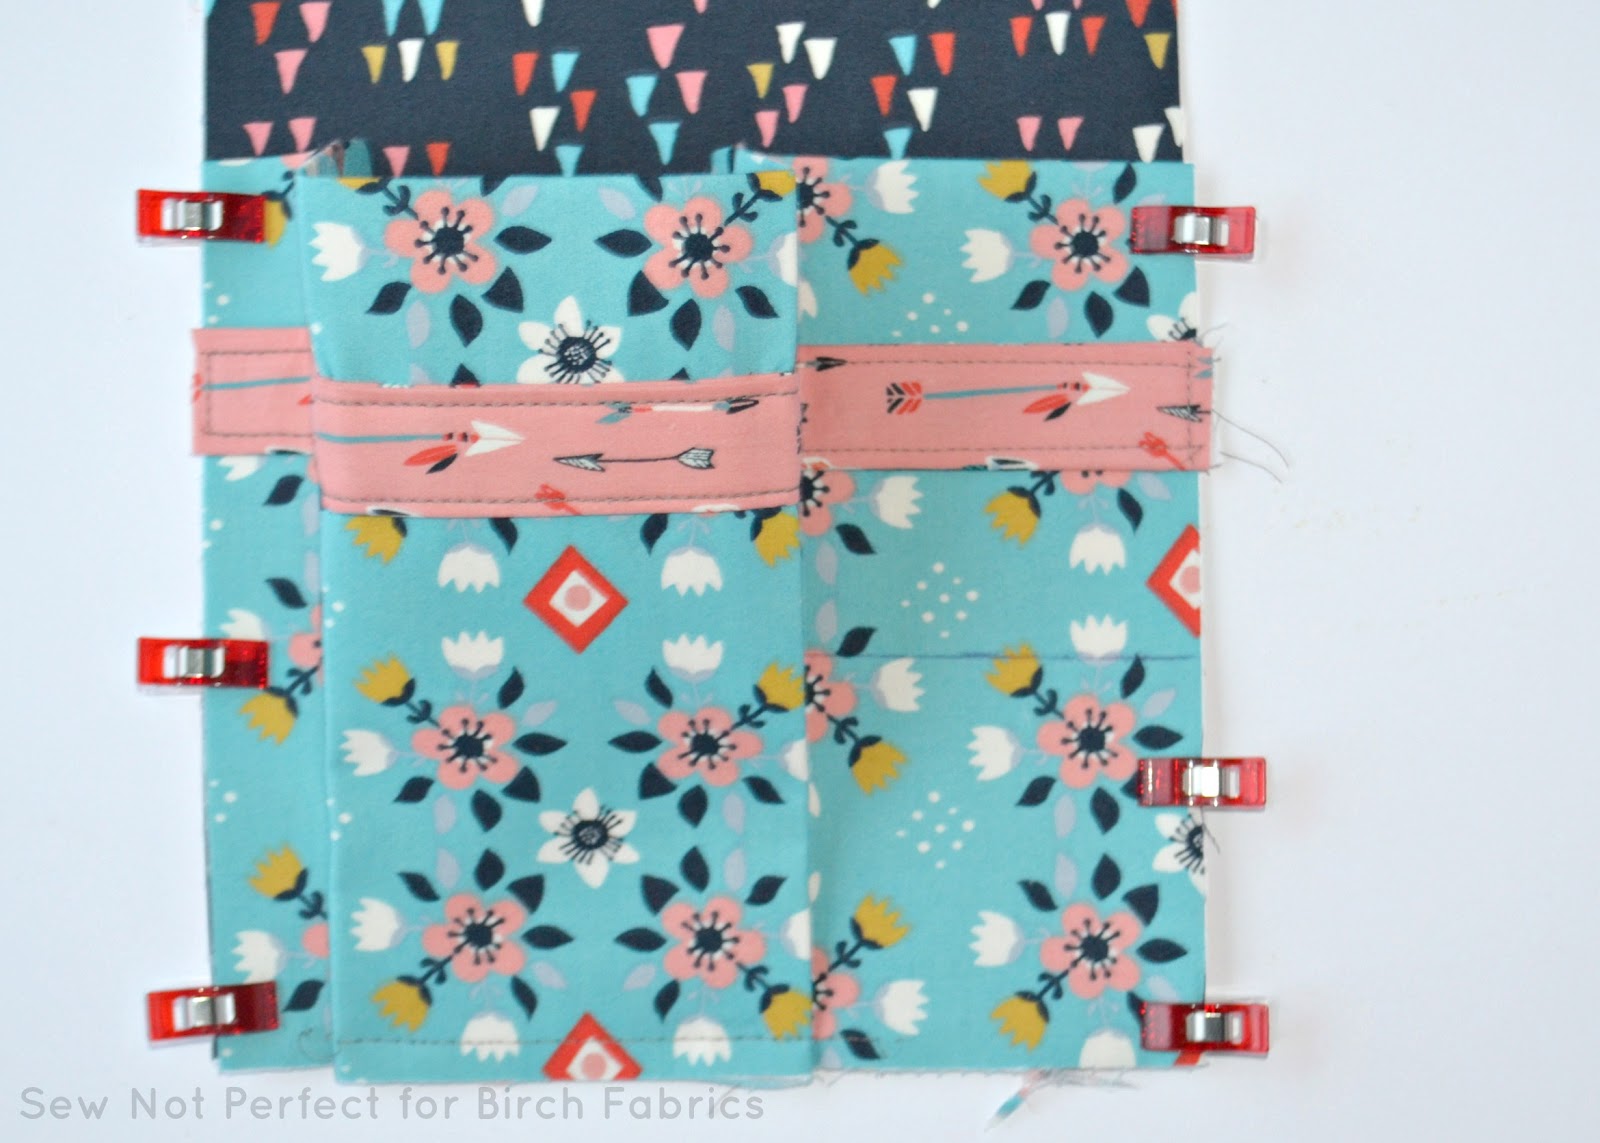
6. Lay one MAIN PIECE right side up. Place the POCKET PIECE on top, also right side facing up, and align the bottom and sides. The sides should match up evenly, but depending on the folding, you might end up with one piece slightly off. Trim, if necessary, to make the sides match (if you need to trim the MAIN PIECE, be sure to trim both PIECES). Pin and/or baste POCKET PIECE to the MAIN PIECE along the sides and bottom close to the edge.
7. Sew along the stitching line you marked previously (4” from the top of the POCKET PIECE, from the right edge to the first crease).
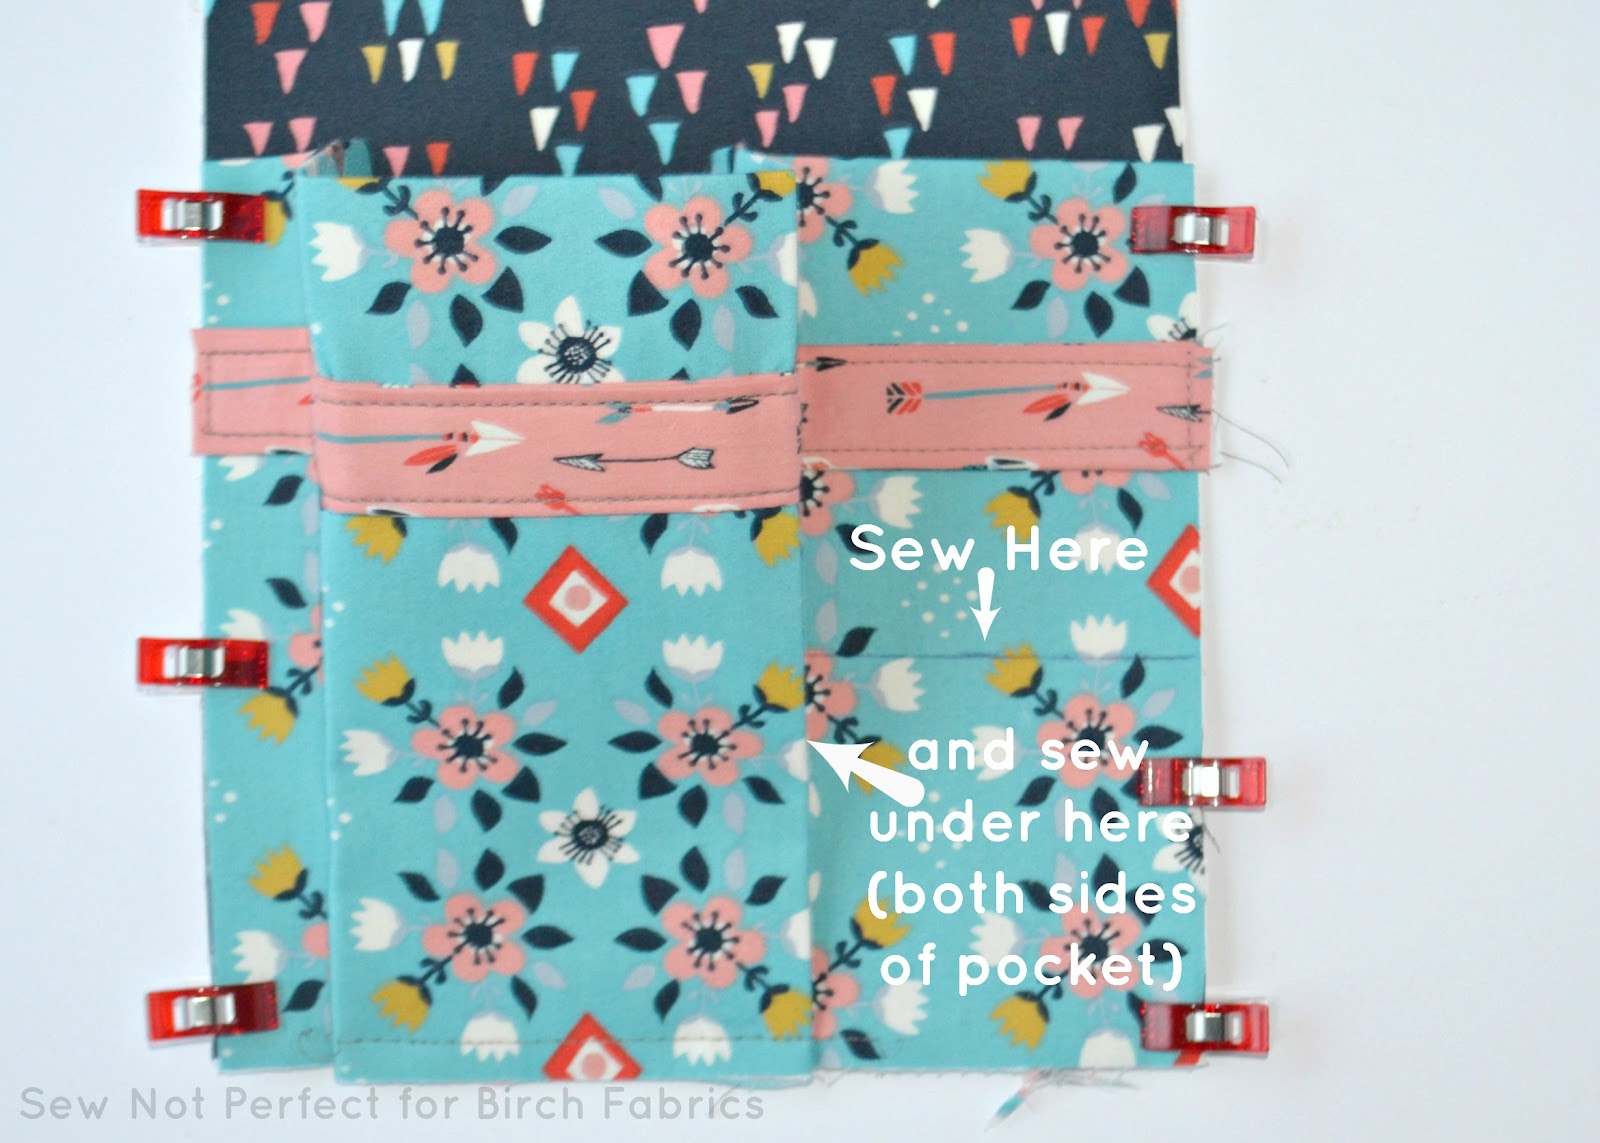
8. Sew along the first crease from the right edge, beginning at the bottom edge and going to the top, backstitching over the top where the POCKET PIECE ends. For extra security, you may want to stitch a few stitches perpendicular to this line of stitching (parallel to the top edge). Also, sew along the first crease from the left edge at least near the top, securing the top the same way you did on the other side.
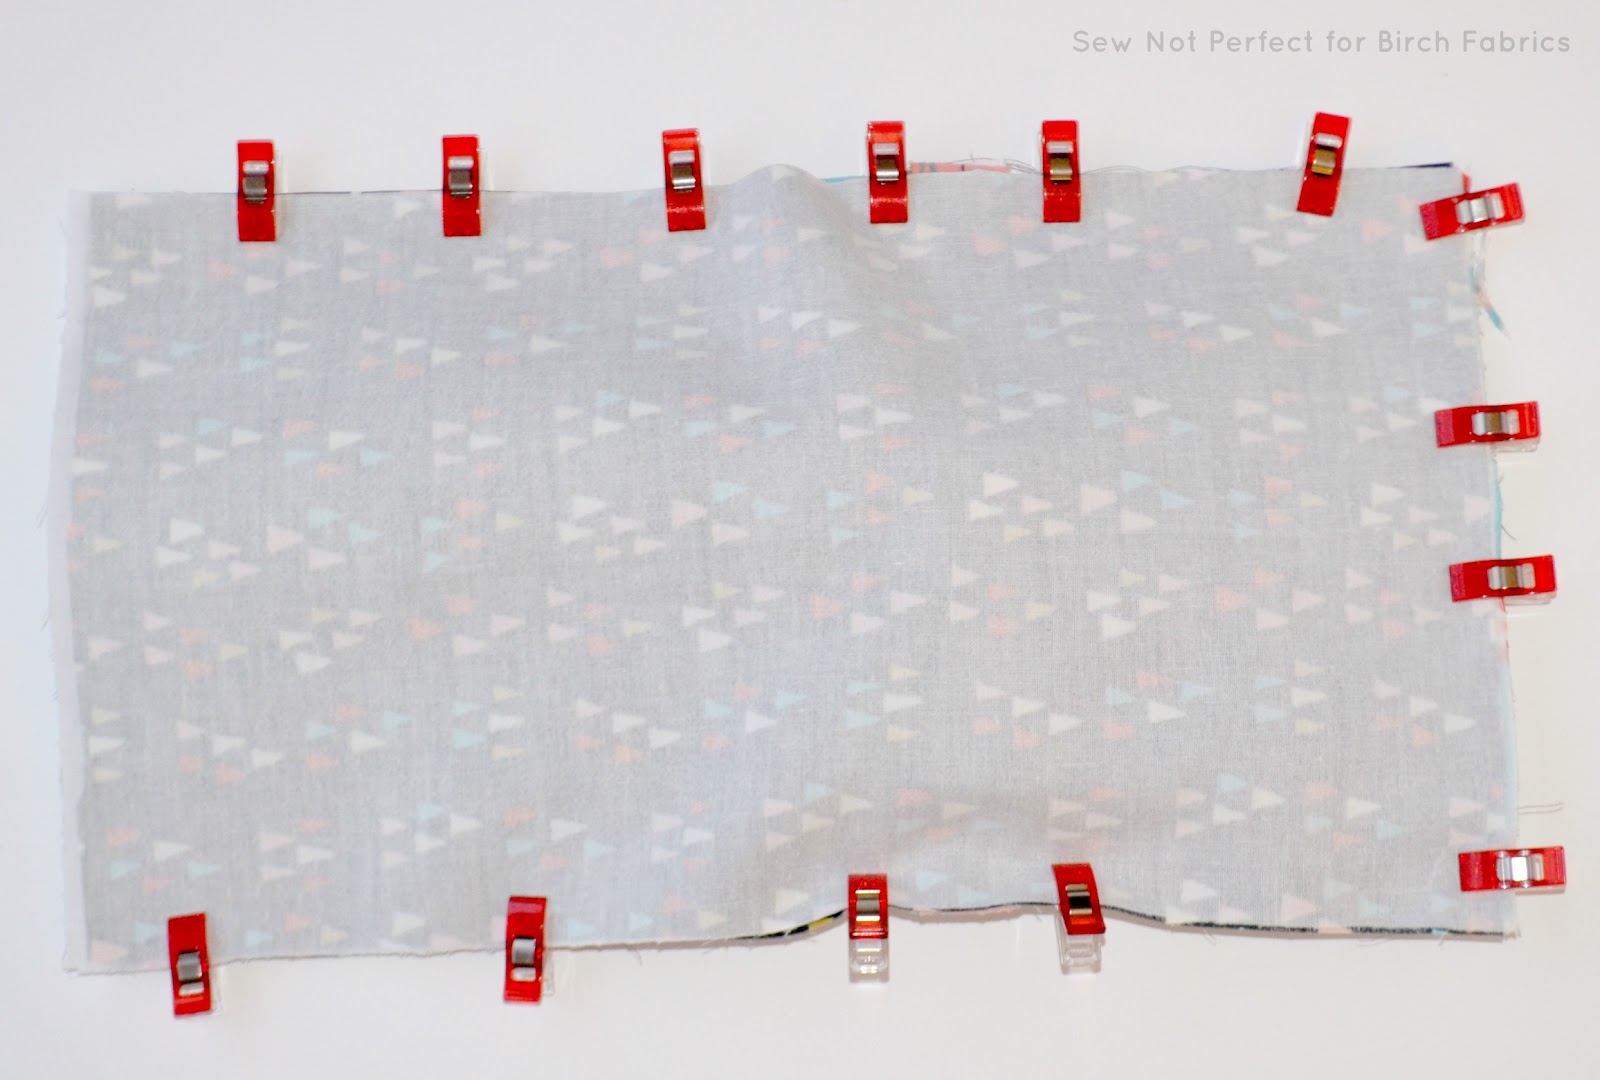
9. Lay the second MAIN PIECE with right sides together facing down on top of both the first MAIN PIECE and the POCKET PIECE (right sides are together). Sew at ½” along the right edge, across the bottom and along the left edge, leaving the top edge unsewn.

10. Clip corners and then turn right sides out.
Along the open top edge, turn ½” seam allowance to the inside and topstitch the opening closed or hand stitch. You can also choose to topstitch around the entire perimeter. You are done!
Optional Pincushion:
-
Fold in half with right sides together and press. If using Wildland Patch, be sure to fold along the line between patches. Use clips or pins to secure.
-
Sew at a scant ½” along the three open sides, leaving a 2” opening. Clip corners.
-
Turn right side out through opening. Fill with Fiberfill, fabric or batting scraps.
-
At opening, turn seam allowance to the inside and close the opening with your preferred method (hand stitch, edge stitch, Stitch Witchery, etc)

POCKET PIECE - cut 15.25”w x 15”h {I used Birch Fabrics Wildland Flowerbed Blue}
note: the bottom half of this fabric will face outward, if placement matters
note: the bottom half of this fabric will face outward, if placement matters
2. Take the POCKET PIECE and fold in half and press with iron. (The POCKET PIECE should now measure 15.25”w x 7.5”h). The folded edge is now the top, and the unfinished edges are the bottom.
I (straight line) at 1”, 2.5”, 4”, 8”, 9.5” and 11”
^ (or an arrow) at 1.75”, 3.25”, 8.25” and 10.25”
Along the open top edge, turn ½” seam allowance to the inside and topstitch the opening closed or hand stitch. You can also choose to topstitch around the entire perimeter. You are done!
Fold in half with right sides together and press. If using Wildland Patch, be sure to fold along the line between patches. Use clips or pins to secure.
Sew at a scant ½” along the three open sides, leaving a 2” opening. Clip corners.
Turn right side out through opening. Fill with Fiberfill, fabric or batting scraps.
At opening, turn seam allowance to the inside and close the opening with your preferred method (hand stitch, edge stitch, Stitch Witchery, etc)
Comments