Magnolia Garden Quilt Tutorial
View more tutorials on Fabricworm.com
We could not resist designing a new quilt around Laura Gunn's beautiful new line, Magnolia Lane for Michael Miller. The designs are so original, vibrant and textured. Wanting to highlight the prints, I kept the design really simple. Besides showing off all of the prints, the simple design also means that making this quilt takes a lot less time.
This quilt measures 76" square. It is perfect for a full size bed.
 And here is the back.

We loved these prints together so much we even designed a special fat quarter set just for this quilt.


 |
| Magnolia Garden Quilt Bundle 12 Fat Quarters |
MATERIALS
12 fat quarters of Laura Gunn's Magnolia Lane2 1/2 yards of Laura Dunn Canvas Cream
4 1/2 yards of Laura Dunn Canvas Brown for the quilt back
1/2 yard Laura Dun Textured Plaid Turquoise
80" x 80" cotton batting
Coordinating thread
INSTRUCTIONS
Sort the fabric into the following groups: Light (Blooming Tulips Yellow, Canvas Candy, Canvas Cream, Canvas Sage), Medium (Scattered Buds Yellow, Geometric Aqua, Canvas Green, Canvas Mustard), and Dark (Textured Plaid Turquoise, Magnolia Branch Aqua, Canvas Teal, Canvas Brown).

Cutting
1. Cut all of the fabric in the Light group into 7" strips. Cut the strips into varying widths.

2. Cut the fabric in the Medium group into 6" strips. Cut the strips into varying widths. You will only need to cut about 2/3 of the fabric. The rest can be used for the back.

3. Cut the fabric in the dark group into 3" strips. Cut the strips into varying widths. To create a little visual interest, I also cut a few strips 2" wide. You will only need to cut about 2/3 of the fabric. The rest can be used for the back.

4. For the Canvas Cream, cut the following strips selvage to selvage: 2 strips 11" wide, 2 strips 8" wide, 2 strips 7" wide, and 4 strips 6" wide. Trim the selvages.
Making the Quilt Top
1. Starting with the dark fabrics, sew the pieces together, alternating the different prints. The easiest way to do this is using the string piecing method. Start with two pieces of fabric and sew them together, back stitching at the beginning and end. Now, instead of cutting the thread, take the next two pieces and sew them together.

Continue this until you have sewn together all of the pieces. Cut the threads between each pair and then sew the pairs together. Continue this until you have 4 strips measuring approximately 76" long. As I mentioned above, I made one of my dark strips 2" wide. Iron the seams open.

2. Repeat the string piecing technique for the light and medium fabrics. You will end up with 3 strips of each.
Here are all of the strips laid out.

3. Sew the 2 pieces of 11" Canvas Cream and sew them together to create one long strip 11" wide. Repeat with the other remaining pieces of Canvas Cream so you have 5 long strips.
4. Trim all of the strips down to 76" long.
5. Lay out your long strips, alternating the prints with the Canvas Cream.

6. Sew all of the strips together and press the seams open.
Here is just a bonus shot of prettiness.

Assembling the Quilt Back
1. Cut the 4 1/2 yards of Canvas Brown in half so you have two panels that are 81" long.
2. Trim the selvages.
3. Take the remaining prints and cut them into 3" wide pieces. Sew them together using the string piece method. Press the seams open.
4. Sew the strip of prints to the two panels of Canvas Brown. Press seams open.

Assembling the Quilt
I tried a temporary spray adhesive to baste this quilt. It worked really well and went a lot faster than my usual pining method.
1. Lay the quilt back onto the floor, right side facing down. Using painter's tape, tape the back to the floor, making the quilt back taunt and smooth.

2. Lay the cotton batting on top of the quilt back. Gently fold half of the batting back. Spray the adhesive to the quilt back. Slowly fold the batting back onto the quilt back, smoothing out any wrinkles as you go. Fold the other half of the batting back and repeat the above directions.

3. Lay the quilt top on top of the batting. Fold half of the quilt top back, spray the adhesive and then fold the top back onto the batting, smoothing out any wrinkles.

Quilting and Binding
I used my favorite meandering quilting style for this quilt.

The Textured Plaid Turquoise is cut on the bias for the binding strips. Click over here for my tutorial on how to bind a quilt.

Congratulations! You are all done!

Thanks to Melissa Lunden for another Fabulous Quilt Tutorial!! You rock lady Mel!!

Cutting
1. Cut all of the fabric in the Light group into 7" strips. Cut the strips into varying widths.

2. Cut the fabric in the Medium group into 6" strips. Cut the strips into varying widths. You will only need to cut about 2/3 of the fabric. The rest can be used for the back.

3. Cut the fabric in the dark group into 3" strips. Cut the strips into varying widths. To create a little visual interest, I also cut a few strips 2" wide. You will only need to cut about 2/3 of the fabric. The rest can be used for the back.

4. For the Canvas Cream, cut the following strips selvage to selvage: 2 strips 11" wide, 2 strips 8" wide, 2 strips 7" wide, and 4 strips 6" wide. Trim the selvages.
Making the Quilt Top
1. Starting with the dark fabrics, sew the pieces together, alternating the different prints. The easiest way to do this is using the string piecing method. Start with two pieces of fabric and sew them together, back stitching at the beginning and end. Now, instead of cutting the thread, take the next two pieces and sew them together.
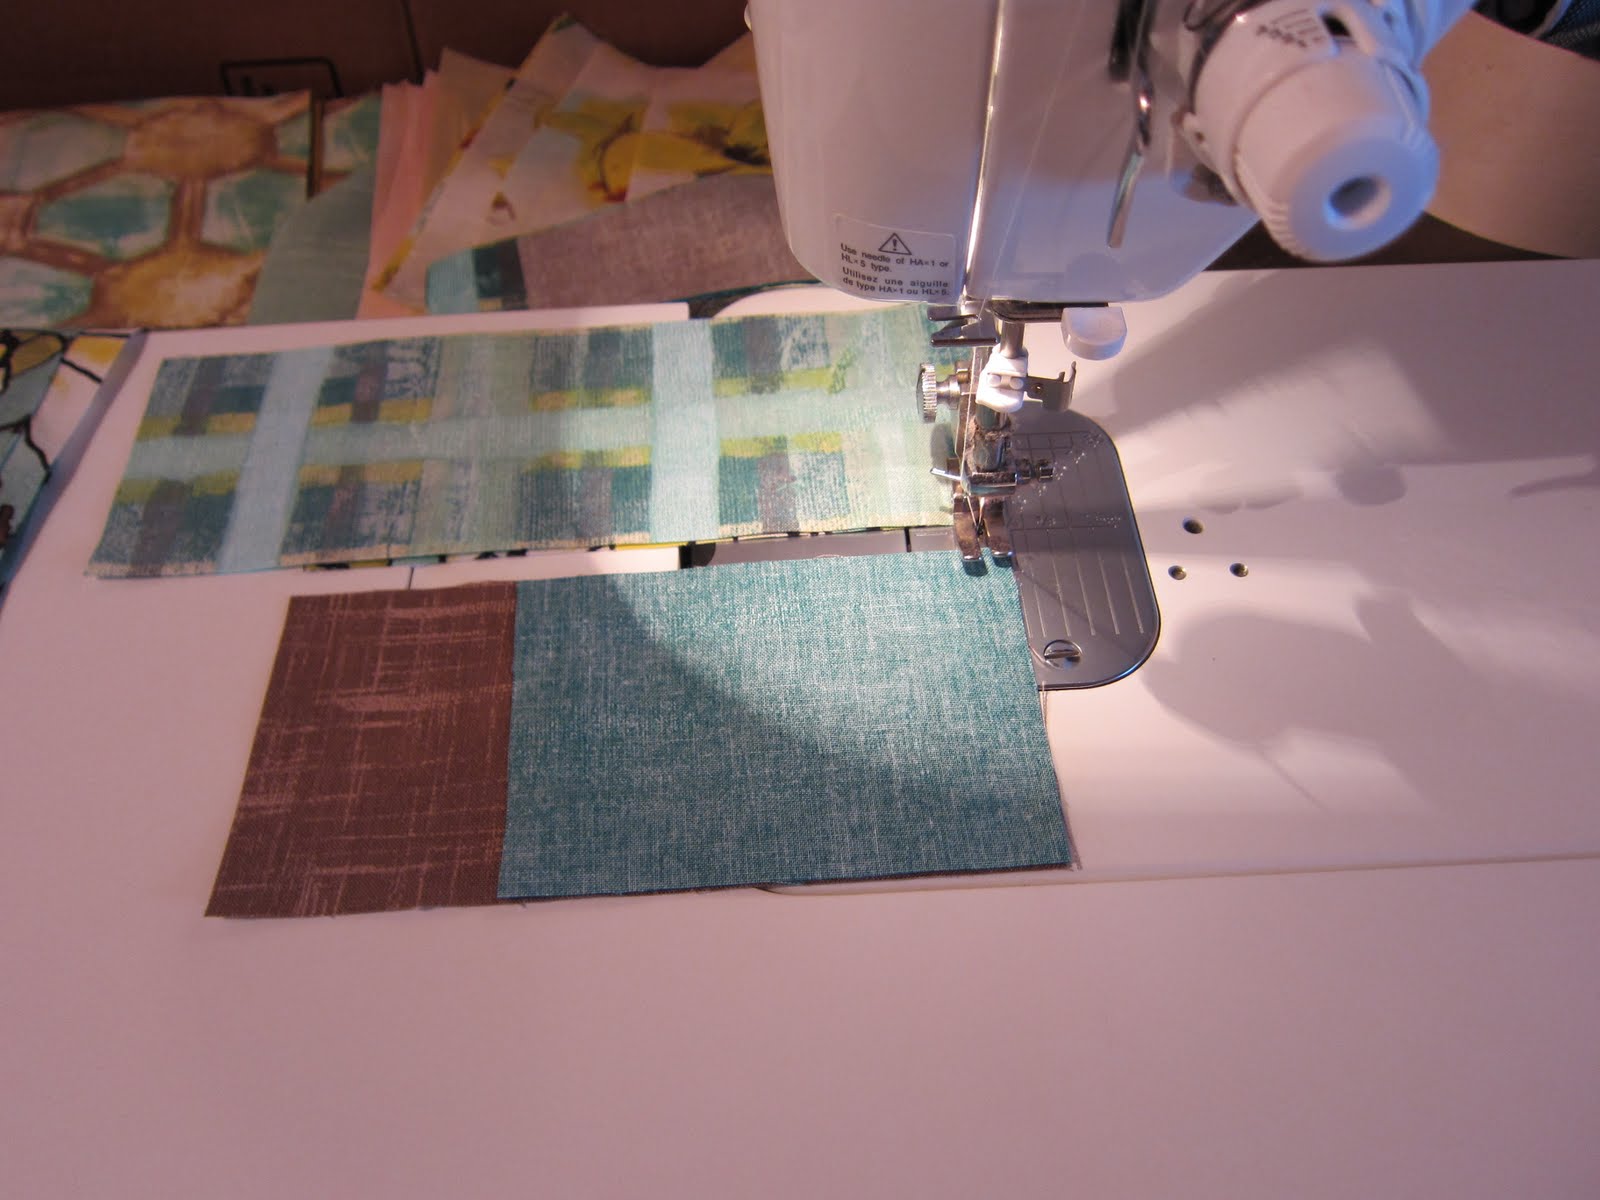
Continue this until you have sewn together all of the pieces. Cut the threads between each pair and then sew the pairs together. Continue this until you have 4 strips measuring approximately 76" long. As I mentioned above, I made one of my dark strips 2" wide. Iron the seams open.

2. Repeat the string piecing technique for the light and medium fabrics. You will end up with 3 strips of each.
Here are all of the strips laid out.

3. Sew the 2 pieces of 11" Canvas Cream and sew them together to create one long strip 11" wide. Repeat with the other remaining pieces of Canvas Cream so you have 5 long strips.
4. Trim all of the strips down to 76" long.
5. Lay out your long strips, alternating the prints with the Canvas Cream.
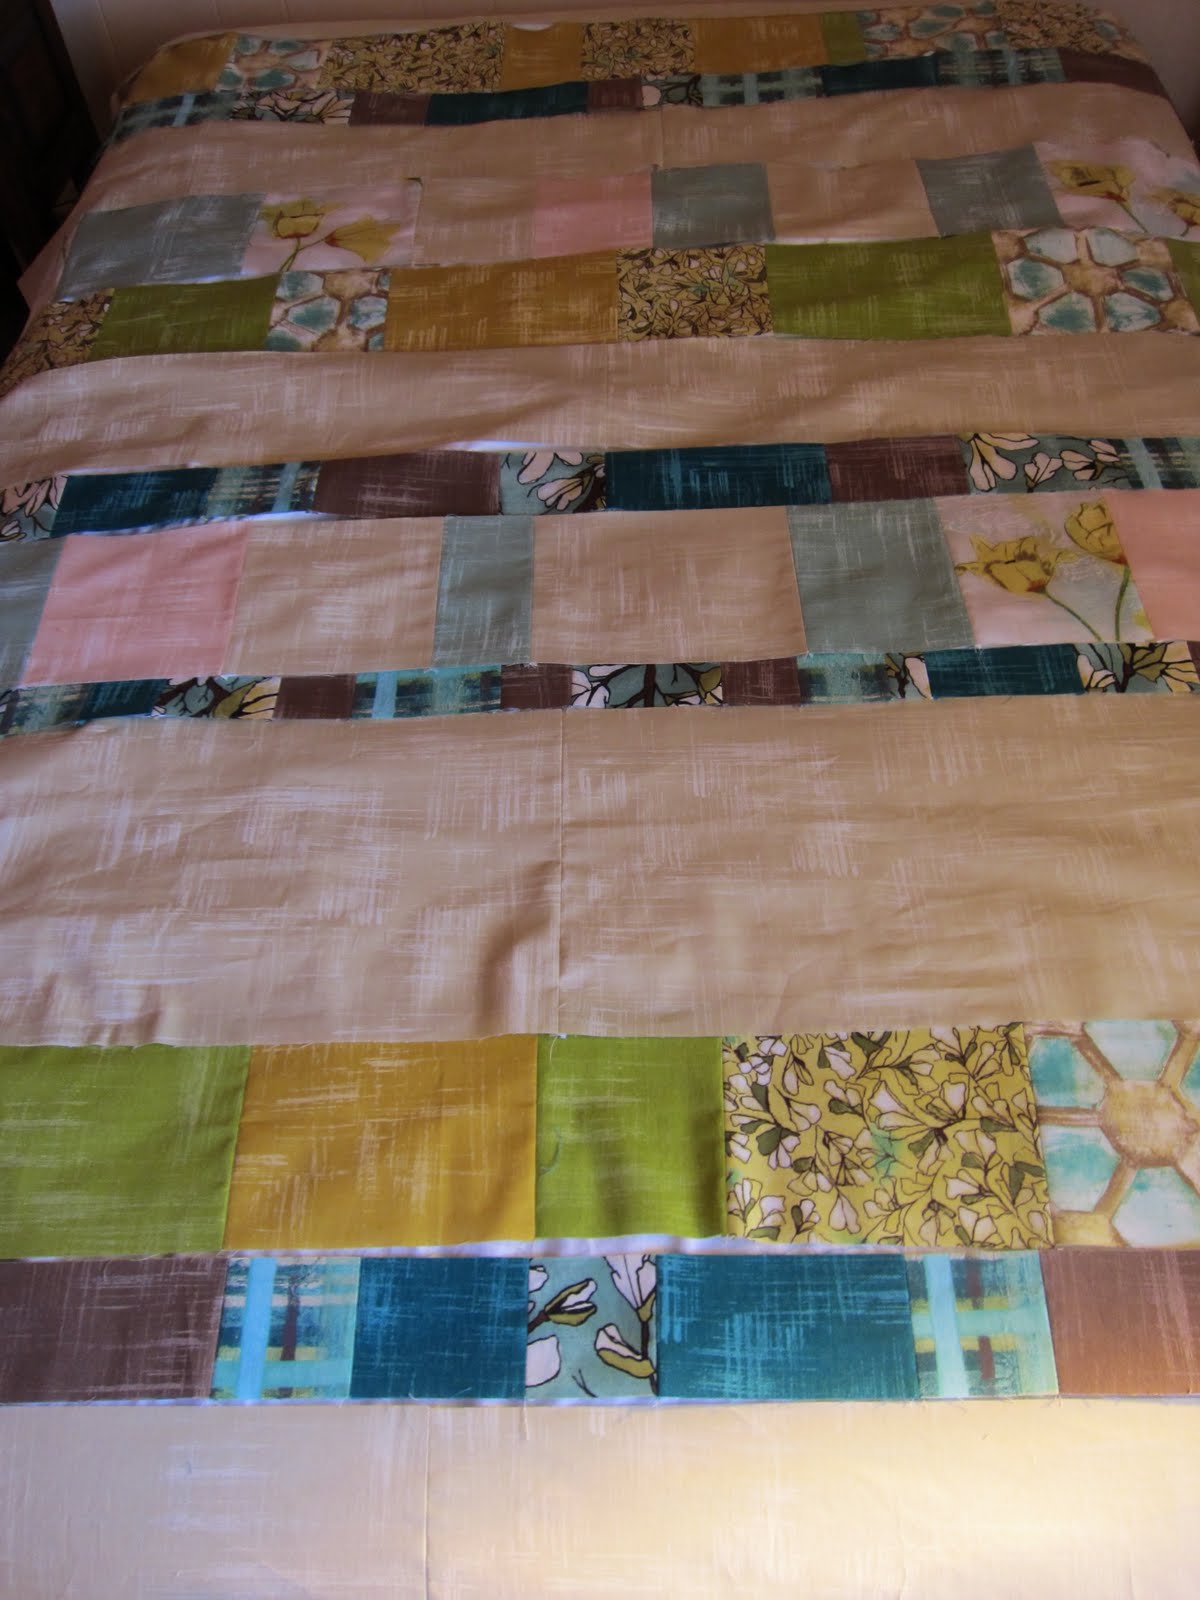
6. Sew all of the strips together and press the seams open.
Here is just a bonus shot of prettiness.

Assembling the Quilt Back
1. Cut the 4 1/2 yards of Canvas Brown in half so you have two panels that are 81" long.
2. Trim the selvages.
3. Take the remaining prints and cut them into 3" wide pieces. Sew them together using the string piece method. Press the seams open.
4. Sew the strip of prints to the two panels of Canvas Brown. Press seams open.

Assembling the Quilt
I tried a temporary spray adhesive to baste this quilt. It worked really well and went a lot faster than my usual pining method.
1. Lay the quilt back onto the floor, right side facing down. Using painter's tape, tape the back to the floor, making the quilt back taunt and smooth.

2. Lay the cotton batting on top of the quilt back. Gently fold half of the batting back. Spray the adhesive to the quilt back. Slowly fold the batting back onto the quilt back, smoothing out any wrinkles as you go. Fold the other half of the batting back and repeat the above directions.

3. Lay the quilt top on top of the batting. Fold half of the quilt top back, spray the adhesive and then fold the top back onto the batting, smoothing out any wrinkles.

Quilting and Binding
I used my favorite meandering quilting style for this quilt.

The Textured Plaid Turquoise is cut on the bias for the binding strips. Click over here for my tutorial on how to bind a quilt.

Congratulations! You are all done!

Thanks to Melissa Lunden for another Fabulous Quilt Tutorial!! You rock lady Mel!!
Comments
http://handmadeconamor,blogspot.com
Tamara
Emily Compagno